
Practical Guide: How to Clean a Mattress and Get Rid of Stains and Odors
Cleaning your mattress is way more than just wiping away a stain. It's actually about your health! While it might seem tricky, the most effective way to do it relies on three key steps: vacuuming thoroughly, tackling stubborn stains with home remedies (think baking soda and vinegar – they're your best friends!), and disinfecting to wave goodbye to dust mites and bacteria. With this guide, you'll turn your mattress into a true sleep sanctuary.
Why Cleaning Your Mattress is Key for Your Health
Think about it for a sec: your mattress is way more than just a place to sleep. Night after night, without you even realizing it, it turns into a hidden ecosystem. Dead skin cells, sweat, dust, and – what should really concern you – millions of dust mites pile up there. These tiny microscopic critters and their waste are major allergens that can cause or worsen breathing issues, skin allergies, and even asthma.
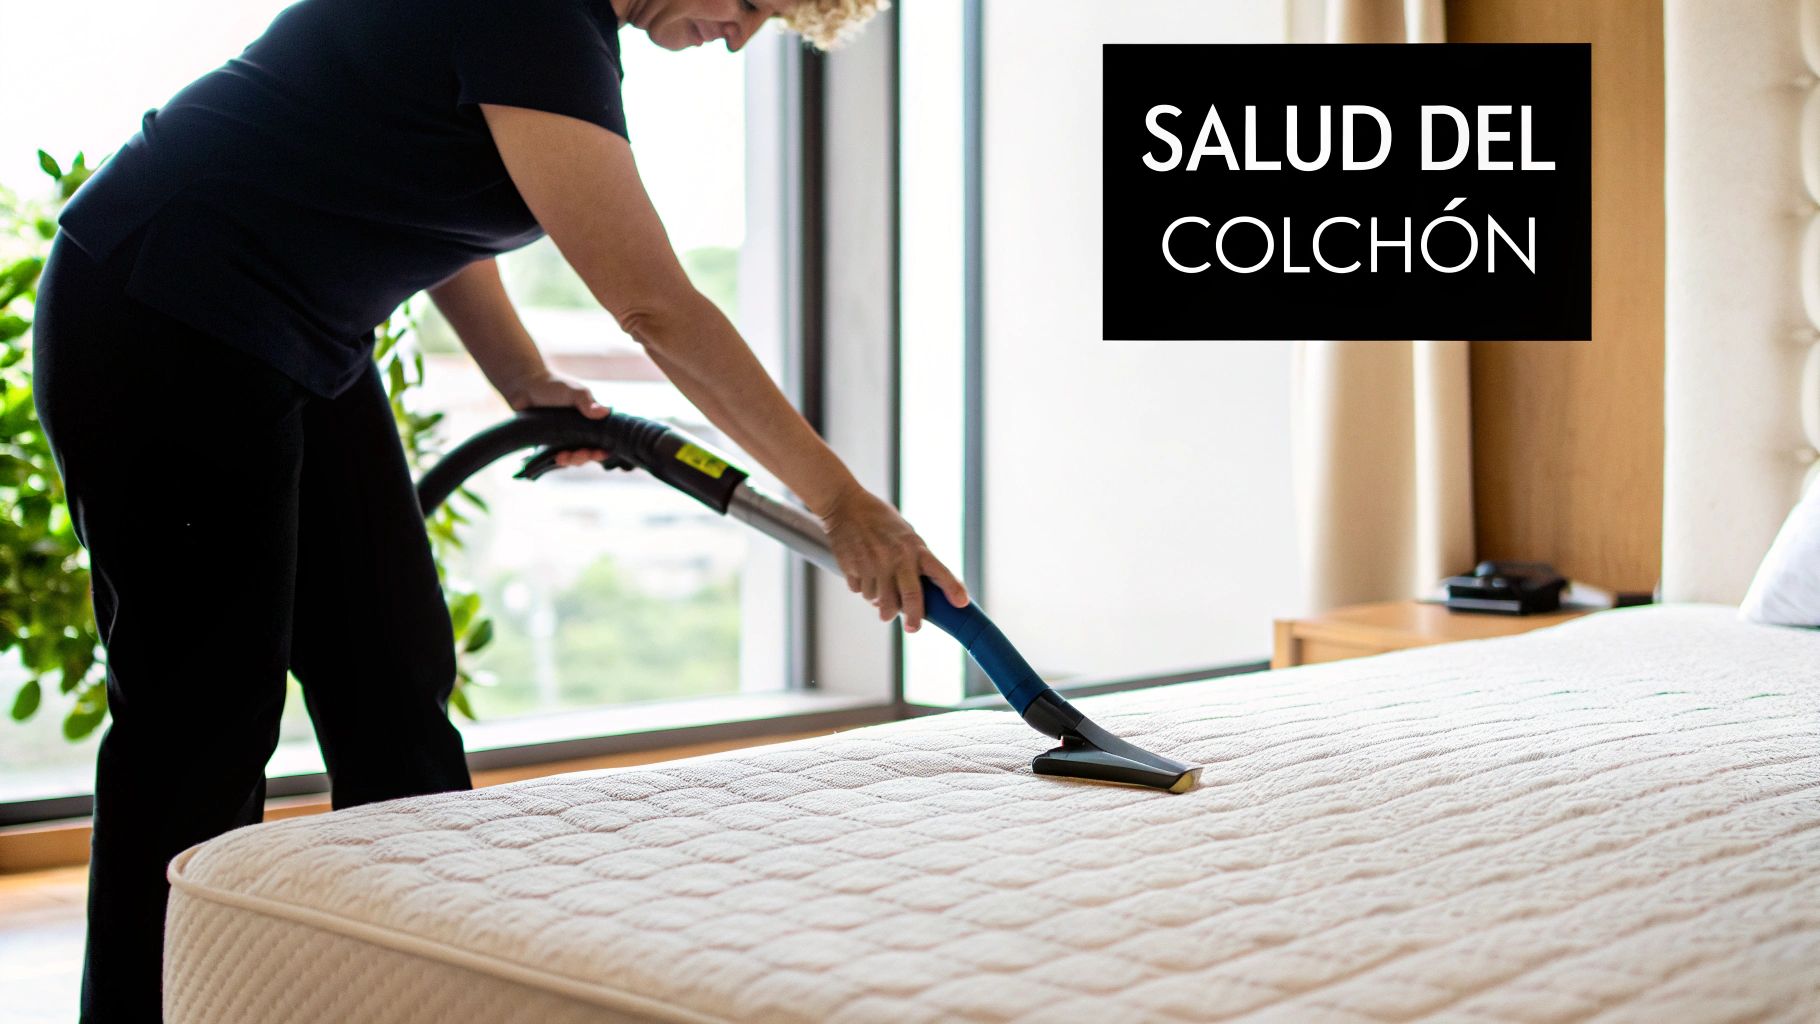
Skipping mattress hygiene is like willingly exposing yourself every night to an environment that slowly chips away at your well-being. A thorough clean doesn't just get rid of stains and smells; it tackles the problem at its root, amazingly improving the air quality you breathe while you sleep.
The Direct Impact on Your Sleep
A clean, fresh sleep environment is the foundation for truly restorative rest. Lingering odors or just the thought of sleeping on a surface full of allergens can really mess with your ability to get that deep, rejuvenating sleep you desperately need. By cleaning your mattress regularly, you're winning on several fronts:
- Fewer Allergens: You'll minimize exposure to dust mites, mold, and other irritants that are definitely not doing your breathing any favors.
- Total Hygiene: You get rid of bacteria and germs that have built up from sweat and skin cells.
- Longer Lifespan: Good maintenance keeps your mattress materials from wearing out too soon.
- A healthier sleep: A clean space gives you that feeling of well-being and comfort that's super important for a really good night's sleep.
Luckily, this habit is really catching on in Spain. In fact, 48% of Spaniards said they cleaned their homes more often in 2021 than the year before. We're among the top 30% of European countries most aware of this task, where cleaning your mattress regularly is already a routine. Experts like microbiologist Gem McLuckie recommend doing it at least every six months.
Don't underestimate the power of a clean mattress. It's a direct investment in your respiratory health, your skin quality, and, at the end of the day, your energy to conquer the world.
Understanding what's brewing under your sheets is the first step to getting started. If you're super curious and want to know more about the microorganisms sharing your bed, check out our article on when bacteria and dust mites build up in your clean mattress.
The foolproof method for a deep clean and disinfection
Alright, you've got everything ready. Now it's time to roll up your sleeves and get to work. Don't worry, this method isn't rocket science, but it does need a bit of patience so each step does its job. The goal is simple: give a new lease of life to the surface where you spend every night, getting rid of all that stuff that, even if you can't see it, you know is lurking there.
The first round in this battle against dirt is, funnily enough, the one most people skip. And yet, it's one of the most important: a really thorough vacuuming.
The power of a good initial vacuum
Lots of people spend barely a minute on this step, but trust me, that's a mistake. This is where you get rid of the first layer of 'intruders': dust, dead skin, pet hair, and, most importantly, a huge amount of dust mites and their waste.
To do it right, you need the proper tool. Forget the brush you use for the floor; look for your vacuum's upholstery attachment. Yeah, the one that usually has a felt strip or soft bristles.
Vacuum the entire mattress surface slowly and carefully. Don't forget the sides or the seams – those are dust's favorite hiding spots. Take your time. Imagine you're painting a wall: each pass should overlap the previous one a bit so you don't miss a single inch. This simple step can get rid of up to 70% of surface allergens before you even think about getting anything wet.
Once you've gone over every corner, it's time to tackle those odors that have built up over time.
Baking soda: the ultimate natural deodorizer
Baking soda is a real multi-tasker when it comes to cleaning a mattress. It's cheap, safe, and has an amazing ability to soak up moisture and neutralize bad smells, not just cover them up. Its secret lies in its slightly alkaline pH, which fights off the acids that cause odors like sweat.
Grab a box of baking soda and if you have a sifter or a strainer handy, use it to sprinkle it evenly over the entire mattress. Don't be shy with the amount; the idea is to create a thin but visible layer that covers it completely.
A golden tip: Let the baking soda work its magic for at least 45 minutes to an hour. If you have more time and the smells are persistent (from humidity or tobacco, for example), let it sit for several hours, or even all afternoon. The longer it sits, the more odors and moisture it'll trap.
While the baking soda does its thing, open the windows wide. Good ventilation not only helps air out the mattress, but it'll also make drying it much easier later on, which is key to preventing mold issues. Once the time is up, vacuum thoroughly again with the same upholstery attachment until all the white powder is gone. You'll notice the difference right away: the mattress will smell much fresher and more neutral.
The disinfection phase: safe and effective
With your mattress now free of dust and smells, we've just got one last step: disinfection. The goal is to get rid of bacteria and germs without soaking the mattress or using harsh chemicals that could damage the materials or leave toxic residues. And for this, homemade solutions are your best friends.
You've got several super safe options that work wonderfully:
- White vinegar solution: In a spray bottle, mix one part white vinegar with two parts water. Vinegar is a super powerful natural disinfectant thanks to its acidity.
- A touch of essential oils: If you want to boost the disinfectant effect and, while you're at it, leave an amazing scent, add about 10-15 drops of tea tree, lavender, or eucalyptus essential oil to the mix. These oils are known for their antibacterial and antifungal properties.
Now, lightly and evenly spray the solution over the surface. The key here is to spray a fine mist, not soak the fabric. Keep the bottle about 30 centimeters away. If you go overboard with the moisture, especially on memory foam mattresses, you risk trapping it inside and ending up with mold.
This natural product approach is super versatile. If you want to expand your knowledge of home hygiene, I recommend exploring different homemade cleaning recipes, which will help you maintain a healthier environment overall.
Once disinfection is done, drying becomes the most critical phase. We'll go over it in detail next to make sure all this effort doesn't go to waste.
Effective solutions for the toughest stains
Let's face it: accidents happen. A spilled cup of coffee in the morning, a little nighttime mishap from the kids or your pet, or just sweat building up over time... all of these can leave marks on your mattress that seem impossible to get rid of. But before you throw in the towel, take a deep breath. If you act fast and use the right method, most of these stains can totally be fixed.
The big secret to cleaning a mattress isn't scrubbing with all your might, but using the right product for each type of substance. When you scrub frantically, all you do is spread the stain and make it sink deeper into the fibers. What a total mess!
Let's check out how to tackle the three most common and dreaded types of stains. You'll see that with ingredients you probably already have at home, you can get some amazing results.
Before you tackle a specific stain, it's super important to prep the surface. Here's a quick visual rundown of the three key steps for any deep clean.
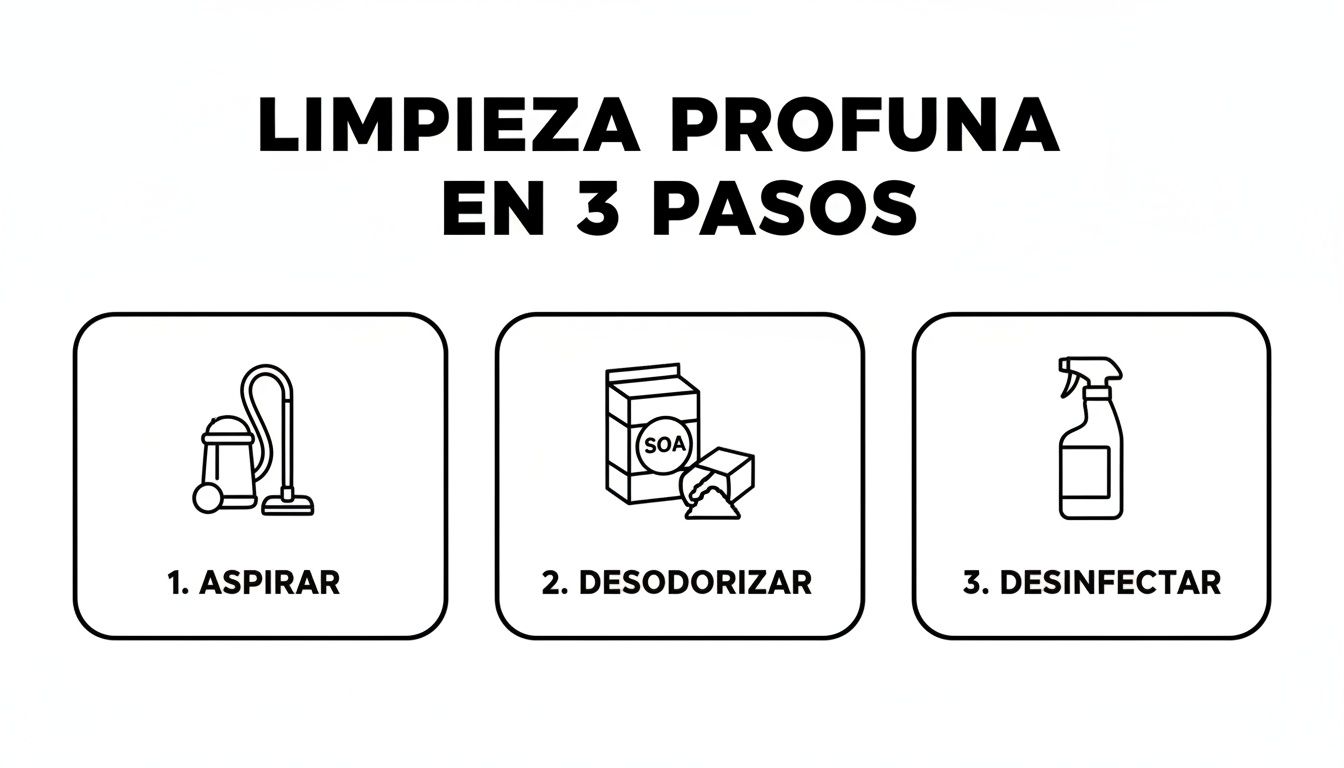
Think of these steps (vacuum, deodorize, and disinfect) as the foundation we'll build on to get rid of those really tough marks.
How to get rid of urine stains and their smell
Urine stains are a double whammy: they leave an ugly yellowish ring and, even worse, an ammonia smell that just sticks around. To fight them, we need a strategy that cleans and neutralizes the odor at the same time.
The very first thing you need to do is soak up as much liquid as possible, and fast! Grab a clean, dry cloth or some paper towels and press firmly on the wet area. Don't rub!
Once you've gotten rid of the excess, baking soda and white vinegar become your best buddies.
- Whip up your cleaning paste: Mix baking soda with a few drops of water until you get a thick paste. Apply it directly onto the stain, making sure to cover it completely.
- Neutralize with vinegar: Spray a mix of white vinegar and water (one part vinegar to two parts water) onto the paste. You'll notice it starts to fizz – that's your sign it's working!
- Let it work its magic: Give the mixture at least an hour to do its thing. This time is super important for the ingredients to break down those uric acid crystals, which are the real culprits behind the bad smell.
- Finish it off: Once it's completely dry, carefully scrape off any leftover paste and give the whole area a good vacuum. The smell should be gone!
An extra tip: If the stain is old and the smell just won't budge, sprinkle dry baking soda over it, cover the area with plastic wrap, and let it sit overnight. The next morning, remove the plastic and vacuum thoroughly.
How to treat fresh blood stains
Blood stains can look super scary, but if you catch them early, they're surprisingly easy to get rid of! The golden rule is always to use cold water. Hot water actually sets the blood proteins into the fibers, making the stain almost permanent.
Your best friend here is hydrogen peroxide (3%), which you probably already have in your medicine cabinet.
Using a cotton swab or a cloth, dab a small amount directly onto the stain. You'll see it start to bubble when it touches the blood – that's proof it's breaking down the stain! Let it sit for a few minutes.
Afterward, gently blot the area with a clean cloth to soak up both the liquid and any residue. If needed, repeat the process, always using a clean part of the cloth until the stain disappears. This method is super effective, but be careful on dark-colored mattresses, as hydrogen peroxide can have a slight bleaching effect.
Say goodbye to yellow sweat stains
Over time, it's totally normal for yellowish stains to pop up where we sweat the most, like around your head or torso. This happens because of how the salts and urea in your sweat react with the fabric.
To get your mattress back to its original color, a mix of lemon juice and salt is a super powerful and natural solution.
- Whip up a paste by mixing the juice of one lemon with a couple of tablespoons of salt.
- Spread the paste over the yellow stains and let it sit for 30 to 60 minutes.
- Remove the mixture with a cloth dampened only with cold water.
- Finally, let the area air dry completely. The acidity of the lemon helps naturally whiten the fabric.
If you're dealing with tougher stains, enzymatic cleaners are a fantastic option. They're specifically designed to break down proteins from bodily fluids like sweat or saliva. In fact, this is often the technology pros use!
The best strategy, without a doubt, is prevention. To keep these little accidents from turning into a big headache, protecting your investment is key. If you want to keep your mattress looking like new, we recommend checking out our article on why an waterproof mattress protector is your best bet.
How to properly dry your mattress to avoid mold
After all the effort you've put into making your mattress look brand new, we get to the trickiest part: drying it. Drying it improperly doesn't just undo all your hard work; it can actually create a much bigger problem. Imagine a damp, dark environment inside the fibers... it's the perfect paradise for mold and mildew!

Hidden moisture is our biggest enemy. The goal isn't just for the surface to look dry, but to make sure there isn't a single drop of water trapped in the deeper layers. Luckily, with a little patience and the right tricks, you'll ensure a complete and risk-free dry.
Natural ventilation is your best friend
The safest and most effective way to dry a mattress is definitely to let fresh air do its thing. Air circulation is crucial for the moisture to evaporate naturally and, most importantly, evenly.
Throw open all the windows in the room to create a good cross-breeze. If you have fans, whether they're standing or ceiling fans, turn them on and point them directly at the mattress. You'll see how much they speed up the process!
A damp mattress can take anywhere from 6 to 24 hours to dry completely, depending on how humid your room is and how much airflow you get. Patience is key here; never, ever make your bed until you're absolutely sure it's dry to the touch everywhere.
Safe Hacks to Speed Up Drying
Even though good airflow is super important, sometimes we need a little extra help, especially if you've only cleaned a small spot and don't want to wait a whole day. Here are a couple of tricks that work wonders:
- Your hairdryer, but on cool mode: For those small, damp spots, your hairdryer can be a real lifesaver. But heads up, it's super important to always use it on the cool air setting or the lowest temperature it has. Direct heat can mess up synthetic fibers or warp memory foam. Keep the dryer moving and about 15-20 centimeters (6-8 inches) away from the surface.
- Baking soda to the rescue: A few hours have passed and your mattress still feels a bit damp? Sprinkle a thin layer of baking soda over the area. This stuff is amazing: it doesn't just get rid of odors, it also soaks up residual moisture like a champ. Let it sit for about an hour, then vacuum it up thoroughly.
Heads Up: Different Mattresses Need Different Care
Not all mattresses are created equal, and they don't all react the same way. What works great for a spring mattress could be a disaster for a memory foam one.
A super important warning: be careful with the sun. While putting your mattress out in the sun seems like a brilliant idea for disinfecting and drying, you really need to be careful. Direct sunlight for too long can degrade and yellow memory foam or latex foams, causing them to lose their properties and become brittle.
If you want to harness the disinfecting power of UV rays, keep it brief (no more than an hour) and, if possible, do it first thing in the morning when the sun isn't as intense. For good old spring mattresses, direct sun poses fewer risks.
Easy Ways to Keep Your Mattress Clean for Longer
After all that hard work making your mattress spotless, the goal shifts: now the mission is to keep it fresh and extend the life of your investment. Deep cleaning a mattress is a huge step, but the real win is in prevention. By just adopting a couple of simple habits, you'll notice a huge difference, saving you time and effort in the long run.
Taking good care of your mattress is more than just a household chore; it's a conscious consumer choice. We live in a throwaway culture that has a real impact. For example, in Madrid during the pandemic, cleaning services collected over eight mattresses per hour that had been abandoned on the street. You can read more about this striking statistic in this report from La Razón. Extending the life of what we own is definitely the way to go.
Your First Line of Defense: The Mattress Protector
If you could only pick one thing to protect your mattress, make it this. A good protector is, quite literally, your bed's life insurance. It's not just a simple cover; it's an almost impenetrable barrier against the worst enemies of your sleep:
- Spills and liquids: It protects you from that accidental morning coffee spill or a glass of wine, preventing liquids from soaking in and leaving permanent stains, or even worse, growing mold.
- Sweat and body fluids: It stops our body's moisture from seeping in night after night, preventing those unsightly yellow stains and bacterial buildup.
- Dust mites and allergens: It acts like a shield, making it super tough for dust mites and other allergens to set up shop inside your mattress.
My advice is to look for a protector that's waterproof but breathable. This combo is the secret sauce: it blocks liquids but still lets air flow through, so heat doesn't build up and your bed always feels fresh. Wash it once a month with the rest of your bedding, and it'll always be in tip-top shape.
Why Rotating and Airing Out Your Mattress Matters
Just like anything that constantly bears weight, your mattress experiences wear and tear. To ensure that wear is even and you don't get premature sags right where you sleep, it's super important to move it around.
The golden rule is to rotate it (turn it head-to-toe) and, if the manufacturer allows, flip it over (turn it upside down) every three to six months. This simple action distributes pressure evenly and can even double its lifespan.
Beyond regular rotation, those little daily habits can make a huge difference.
Never underestimate the power of airing out your room every morning. Before making your bed, pull back the duvet and open your windows wide for at least 10-15 minutes. This helps any moisture built up overnight evaporate, creating a much less welcoming environment for dust mites.
Easy Daily Habits for Ongoing Mattress Care
Deep cleaning is for special occasions, but daily care is what really keeps your mattress feeling new. If you weave these little actions into your routine, you'll definitely notice the difference:
- Wash your bedding weekly: Sheets, pillowcases, and mattress protectors collect dead skin cells, sweat, and body oils. Washing them in hot water (if the label allows) once a week gets rid of all that gunk before it reaches your mattress.
- Vacuum once a month: When you change your sheets, take a moment to give your mattress surface a quick vacuum. It doesn't have to be a deep clean, just a quick pass to get rid of dust and surface particles.
- Act fast on stains: If something spills, don't put it off! Grab a dry cloth and blot up the liquid right away. The sooner you act, the easier it'll be to stop that stain from sticking around forever.
As you can see, keeping your mattress in tip-top shape isn't a huge chore. It's all about creating a simple care routine that'll protect both your health and your investment. If you want to dive a bit deeper, we've got some super helpful info in our guide on the best mattress maintenance.
We're here to clear up your mattress care questions
At this point, it's totally normal to still have a few questions buzzing around. Cleaning a mattress might seem like a task with lots of little details, and it's always better to be safe than sorry. That's why we've gathered the most common questions to give you clear, straightforward answers.
Here, you'll find solutions to those practical questions that pop up right when you get down to business. Our goal is for you to finish this guide feeling super confident about keeping your mattress spotless, ensuring healthy sleep and protecting your investment.
How often should I do a deep clean?
Ideally, you should give it a deep clean, like the one we've described, every six months. This frequency helps keep dust mites, dust, and other allergens at bay – stuff you can't see but definitely affects your room's air quality. A neat trick to remember is to time it with the change of seasons.
Now, this isn't a hard and fast rule. Some situations call for more frequent cleaning, maybe every three or four months:
- If you suffer from severe allergies: Reducing the allergen load more regularly can bring huge relief for your symptoms.
- If your pets sleep with you: Pet hair, dander, and outdoor dirt build up incredibly fast.
- If there's been a spill or accident: Even if you act right away, a follow-up general clean ensures no trace is left behind.
Besides this bi-annual deep clean, getting into the habit of vacuuming your mattress every month when you change your sheets is a simple step that makes a huge difference.
Is it a good idea to use a steam cleaner on your mattress?
You've got to be super careful here. While steam is a powerful natural disinfectant, using it on mattresses is pretty risky, and generally, we don't recommend it. The main issue is the huge amount of moisture it injects into the inner layers of your mattress.
If that moisture doesn't evaporate completely and super quickly, you're creating the perfect environment for mold and mildew to pop up. And trust us, that's a much bigger and harder problem to fix than the original stain.
Using a steam cleaner can actually void the warranty on many mattresses, especially memory foam or latex ones, which are super sensitive to moisture and extreme heat. Before you even think about using one, always check what the manufacturer says.
If you still decide to go for it, proceed with extreme caution: pick a really warm and dry day, ventilate the room as much as possible, and use the absolute minimum amount of steam, without stopping the nozzle in one spot. Dry methods or those with very controlled moisture are always the safest bet.
Which cleaning products should I avoid at all costs?
Steer clear of harsh chemical cleaners like the plague! Products like bleach, ammonia, or multi-purpose cleaners with strong solvents can cause irreparable damage to your mattress materials.
These chemicals can wreak havoc:
- Degrade foams: For memory foam or latex mattresses, they can make the foam harden, discolor, or completely lose its comfy properties.
- Damage fibers: They can weaken and break down the fabric fibers of the cover, drastically shortening your mattress's lifespan.
- Leave toxic residues: Any lingering chemical fumes and residues can be inhaled while you sleep, which is definitely not good for your health.
Always go for gentle solutions. Baking soda, diluted white vinegar, hydrogen peroxide for specific spots, or special enzymatic upholstery cleaners are your best friends: they're safe and really work.
Can I really get rid of an old, yellow stain completely?
Old stains, especially those yellowish ones from sweat or other fluids that have oxidized over time, are the toughest challenge. To be honest, getting rid of them completely is super difficult, if not impossible in many cases.
You can really improve their look with a baking soda paste or enzymatic cleaners, which work by breaking down the stain's proteins. You'll probably fade it until it's almost invisible, but often a slight ring or shadow might still be there.
The real secret here isn't just getting rid of stains, but preventing them and acting fast. Tackling any spill as soon as it happens is the only true way to make sure it doesn't become a permanent part of your fabric.
Here at Morfeo, we know that quality sleep starts with a clean and healthy environment. If, after taking good care of your current mattress, you feel it's time to level up your comfort and sleep tech, we invite you to explore our range of mattresses. They're designed with innovative materials to give your body the support and coolness it needs night after night.
Check out Morfeo mattresses and totally transform your sleep!